Camping trips are incomplete without the invigorating aroma and rich taste of coffee. Picture yourself waking up to the crisp morning air, birds chirping, and the delightful anticipation of that first sip of coffee. But how can you enjoy a freshly brewed cup of joe while surrounded by nature? Fear not, for I have the answer: percolator coffee.
Percolator coffee is the perfect companion for your camping adventures. With its unique brewing method, it extracts bold flavors and provides a robust, satisfying coffee experience. So, let’s dive into the enticing world of percolator coffee and discover how you can savor the perfect cup while embracing the outdoors.
A. Importance of Coffee During Camping Trips
Coffee is more than just a beverage; it’s a ritual that fuels our mornings and brings people together. When you’re camping, coffee becomes even more vital. It helps kickstart your day, rejuvenates your senses, and keeps you energized for the adventures that lie ahead. Whether you’re exploring nature trails, relaxing by the campfire, or engaging in outdoor activities, a cup of coffee complements the camping experience like no other.
B. Benefits of Making Percolator Coffee
Why choose percolator coffee over other brewing methods while camping? The answer lies in the distinctive advantages it offers. Percolators are portable, durable, and require no electricity, making them ideal for outdoor enthusiasts. Moreover, percolation brings out the full-bodied flavors of coffee, giving you a robust and flavorful cup that can stand up to the elements. The process of percolation is an art in itself, allowing you to control the strength and intensity of your brew. With a percolator, you can indulge in the joy of brewing coffee while immersing yourself in the beauty of nature.
C. Overview of the Article
In this comprehensive guide, I will take you through the steps of making percolator coffee while camping. We’ll start by exploring the different types of percolators available and how to choose the right one for your outdoor adventures. Then, we’ll delve into the importance of selecting the right coffee beans and grind size for optimal results. Next, I’ll guide you through the process of preparing your percolator and brewing that perfect cup of coffee. Finally, we’ll discuss the art of serving and storing percolator coffee, as well as some exciting add-ons to enhance your coffee experience.
So, grab your camping gear and prepare to embark on a coffee journey like no other. Let’s learn how to make irresistible percolator coffee that will elevate your camping experience to new heights.
Choosing the Right Percolator for Camping
A. Types of Percolators Available
When it comes to selecting a percolator for your camping adventures, you’ll come across various types to choose from. Each type has its own unique features and advantages. Let’s explore a few popular options:
-
Stovetop Percolators: These percolators are designed to be used directly on a camping stove or a portable burner. They are compact, lightweight, and perfect for backpacking trips. Stovetop percolators offer excellent control over brewing temperature and are known for producing strong, flavorful coffee.
-
Electric Percolators: If you have access to electricity at your campsite, electric percolators can be a convenient choice. They are easy to use and automate the brewing process. Electric percolators are larger in size, making them suitable for car camping or RV trips.
-
French Press Percolators: Although not traditional percolators, French press percolators have gained popularity among camping enthusiasts. They offer a unique brewing experience, combining the benefits of percolation with the immersion method. French press percolators are durable and produce coffee with a rich, full-bodied taste.
B. Factors to Consider When Selecting a Percolator
Choosing the right percolator for camping requires careful consideration of certain factors. Here are a few key aspects to keep in mind:
-
Size and Portability: Consider the size and weight of the percolator, ensuring it fits your camping gear and is easy to carry. Opt for compact and lightweight options for backpacking trips, while larger percolators may be suitable for car camping.
-
Material and Durability: Look for percolators made from sturdy materials like stainless steel or aluminum. These materials offer durability and resistance to outdoor elements. Ensure the percolator is rust-proof and can withstand the rigors of camping.
-
Brewing Capacity: Determine how many cups of coffee you need to brew at once. Percolators come in various sizes, ranging from single-serving to large-capacity options. Choose a percolator that suits your brewing requirements.
C. Recommended Percolator Options for Camping
To kickstart your search for the perfect percolator, here are a few highly recommended options for camping:
-
GSI Outdoors Enamelware Percolator: This classic stovetop percolator features a durable enamel coating and a heat-resistant handle. It’s available in different sizes and offers excellent brewing performance.
-
Farberware Classic Stainless Steel Percolator: A popular choice among campers, this stainless steel percolator is known for its durability and efficient brewing. It has a sleek design, easy-to-use features, and comes in various sizes.
-
Stanley Adventure All-in-One Boil + Brew French Press: For those who prefer the versatility of a French press, this Stanley percolator is a great option. It allows you to brew coffee and boil water in the same container, making it perfect for minimalist camping setups.
Remember, the right percolator can significantly enhance your camping coffee experience. Consider your specific needs and preferences to select a percolator that suits your camping style. Now that we’ve covered the percolator selection process, let’s move on to the next step: choosing the right coffee beans for percolation.
Selecting the Right Coffee Beans for Percolation
A. Importance of Using Freshly Roasted Coffee Beans
When it comes to percolator coffee, using freshly roasted coffee beans is paramount. The freshness of the beans directly impacts the flavor and aroma of your brew. Unlike pre-ground coffee, which tends to lose its essence over time, whole beans retain their natural oils and flavors. By opting for freshly roasted beans, you ensure a more vibrant and flavorful cup of coffee during your camping escapades.
B. Choosing the Right Grind Size for Percolation
The grind size plays a crucial role in the percolation process. For percolator coffee, a coarser grind is recommended to prevent over-extraction and yield a well-balanced brew. The coarser grind allows the water to flow through the grounds at a slower pace, resulting in a rich and robust flavor profile. It also helps to avoid sediment in your cup, enhancing the overall enjoyment of your coffee.
C. Recommended Coffee Beans for Percolator Coffee While Camping
While the choice of coffee beans ultimately depends on your personal preference, certain varieties excel in percolator brewing. Look for beans that offer a bold and full-bodied flavor profile, as percolation brings out the natural richness of coffee. Dark roasts like French Roast, Italian Roast, or Espresso Roast are great options, as they can withstand the intense brewing process while retaining their distinct flavors. Additionally, consider exploring single-origin or specialty blends to add complexity and depth to your percolator coffee.
Remember, when selecting coffee beans for your camping adventures, opt for beans that are freshly roasted, appropriately ground, and cater to your taste preferences. This trifecta ensures a remarkable cup of percolator coffee that will awaken your senses and elevate your camping experience. So, grab your favorite beans and get ready to embark on a flavor-filled journey amidst the serenity of nature.
Preparing the Percolator for Brewing
A. Cleaning and Maintaining the Percolator
Before embarking on your camping trip, it’s essential to ensure your percolator is clean and well-maintained. A dirty percolator can taint the flavor of your coffee and diminish your brewing experience. Start by disassembling the percolator and thoroughly washing each component with warm, soapy water. Pay special attention to the filter basket, stem, and tube, as these areas tend to accumulate coffee residue. Rinse everything thoroughly to remove any soap residue.
To maintain your percolator’s performance, it’s recommended to descale it regularly. Mineral buildup can affect the percolation process and the taste of your coffee. Prepare a solution of equal parts white vinegar and water, then pour it into the percolator. Let it sit for about 15 minutes, then scrub the inside with a brush or sponge. Rinse the percolator thoroughly with clean water to remove any lingering vinegar taste.
B. Assembling the Percolator Correctly
Proper assembly of your percolator is crucial for a successful brewing experience. Start by inserting the stem into the percolator’s base, ensuring it fits securely. Attach the filter basket onto the stem, making sure it sits snugly. Double-check that all components are aligned and fitted correctly to prevent leaks during brewing.
C. Preparing the Water and Coffee Ratio for Brewing
Achieving the perfect water-to-coffee ratio is key to obtaining a delicious cup of percolator coffee. As a general rule of thumb, use one tablespoon of coffee grounds for every six ounces of water. However, you can adjust this ratio based on your personal preference for a stronger or milder brew. Remember, camping may require adjustments due to factors like altitude or water quality, so don’t hesitate to experiment until you find your ideal ratio.
When camping, it’s essential to use fresh, cold water for brewing. Fill the percolator with the desired amount of water, ensuring not to exceed the maximum fill line. Avoid using hot water from a thermos or reboiling old water, as it can affect the taste of your coffee. Now that your percolator is ready, it’s time to embark on the brewing process and enjoy the aromatic journey that awaits.
Brewing Percolator Coffee While Camping
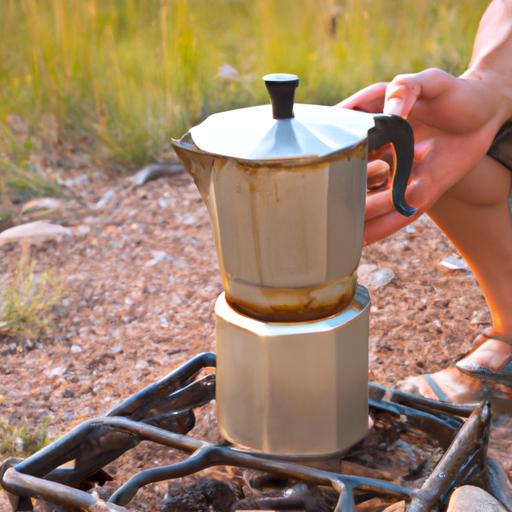
A. Setting up the Campfire or Stove for Brewing
Before we dive into the steps of brewing percolator coffee while camping, let’s ensure we have the perfect setup for our brewing adventure. If you’re using a campfire, make sure you have a sturdy and stable surface to place your percolator. Clear away any debris and create a safe zone for brewing. If you prefer using a stove, set it up according to the manufacturer’s instructions and ensure a stable base.
B. Steps to Follow for Brewing Coffee in a Percolator
-
Measure the Ingredients: Start by measuring the desired amount of water based on the number of cups you want to brew. As a general rule, use one tablespoon of coffee grounds per cup of water.
-
Add Water: Pour the measured water into the percolator’s bottom chamber. Ensure not to exceed the maximum fill line.
-
Insert the Coffee Grounds: Place the coffee grounds in the percolator’s basket or chamber. For a stronger brew, increase the amount of coffee grounds slightly.
-
Assemble the Percolator: Securely attach the percolator’s top chamber onto the bottom chamber. Make sure it is tightly sealed to prevent any leaks during the brewing process.
-
Place on Heat Source: If using a campfire, position the percolator on the hot coals or grate. If using a stove, place it on the burner and adjust the heat to a medium setting.
-
Brewing Time: Allow the water to come to a boil and continue boiling for about 5-10 minutes. Keep an eye on the percolator to ensure it doesn’t boil over.
-
Monitoring the Percolation: Keep an eye on the percolator’s glass knob or indicator to monitor the coffee’s strength. For a milder brew, remove the percolator from the heat source when the coffee reaches your desired strength. For a stronger brew, allow it to percolate for a few more minutes.
C. Tips for Achieving the Desired Coffee Strength and Flavor
- Experiment with different coffee-to-water ratios and brewing times to find your perfect balance of strength and flavor.
- If you prefer a smoother taste, opt for a coarser grind. For a bolder flavor, go for a finer grind.
- Avoid overboiling the coffee, as it can result in a bitter taste. Keep an eye on the percolator and adjust the heat accordingly.
- Consider using freshly roasted and ground coffee beans for the best flavor and aroma.
- Remember to clean your percolator thoroughly after each use to maintain the quality of your brew.
Now that we have brewed a delightful cup of percolator coffee, let’s move on to the final section to learn how to enjoy and elevate your camping coffee experience.
Enjoying Your Percolator Coffee While Camping
Ah, the aroma of freshly brewed percolator coffee wafting through the campsite. It’s time to savor the fruits of your labor and indulge in the delightful flavors of your creation. Here are some tips on how to fully enjoy your percolator coffee while camping:
A. Proper Serving and Storing of Percolator Coffee
After brewing a steaming pot of coffee, it’s essential to serve it at the right temperature. Pour the coffee into insulated mugs or cups to keep it hot for longer periods. This way, you can take your time and relish every sip without worrying about it going cold.
When it comes to storing leftover coffee, opt for an airtight container or thermos. This will preserve the flavors and prevent any unwanted odors from seeping in. Remember, coffee is best enjoyed fresh, so try to consume it within a reasonable timeframe to experience its true essence.
B. Enhancing the Coffee Experience with Add-Ons
While percolator coffee is delicious on its own, you can elevate the experience by adding a touch of creativity. Consider bringing along some add-ons like flavored syrups, cinnamon, or cocoa powder. These little extras can transform your cup of joe into a personalized masterpiece, tailored to your taste preferences.
Additionally, don’t forget to pack some sweeteners and creamers, if desired. They can add a creamy or sweet element to your coffee, making it even more enjoyable. Experiment with different combinations and discover your own signature camping coffee concoction!
C. Final Thoughts and Recommendations for Camping Coffee Lovers
As we conclude our journey through the realm of percolator coffee while camping, I hope you’ve gained valuable insights and inspiration. Remember, making percolator coffee is all about the experience – the crackling of the campfire, the anticipation as the coffee percolates, and the satisfaction of sipping a well-brewed cup amidst nature’s embrace.
To further enhance your camping coffee adventures, consider exploring different coffee bean varieties and roast profiles. Experiment with grind sizes and brewing times to find your perfect balance. And most importantly, savor every moment of your coffee ritual while basking in the beauty of the great outdoors.
So, as you embark on your next camping escapade, don’t forget to pack your trusty percolator and a bag of your favorite coffee beans. Embrace the simplicity and joy of making percolator coffee while camping, and immerse yourself in the delicious flavors that nature and a well-brewed cup of coffee have to offer. Cheers to unforgettable camping moments and the perfect cup of percolator coffee!